Friday, December 22, 2006

The Little Things


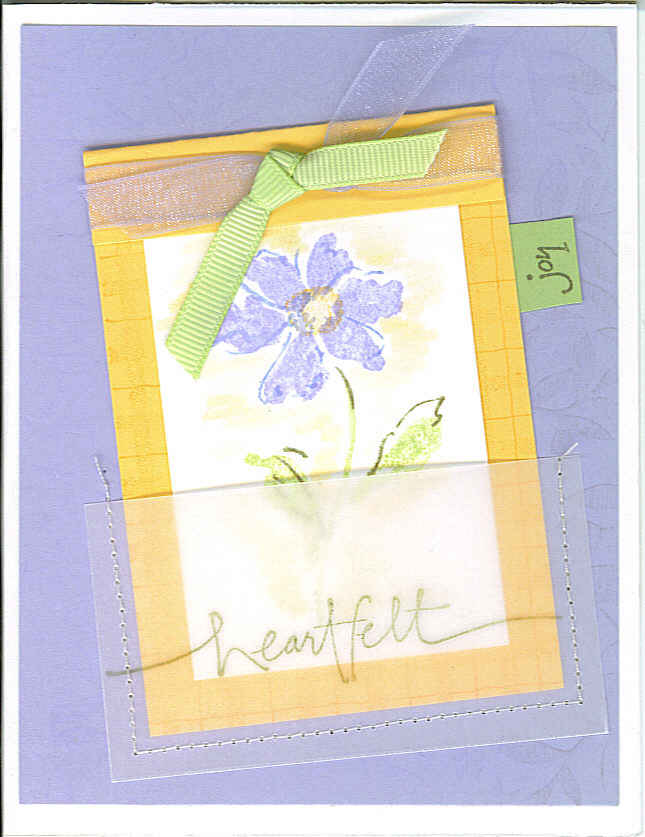
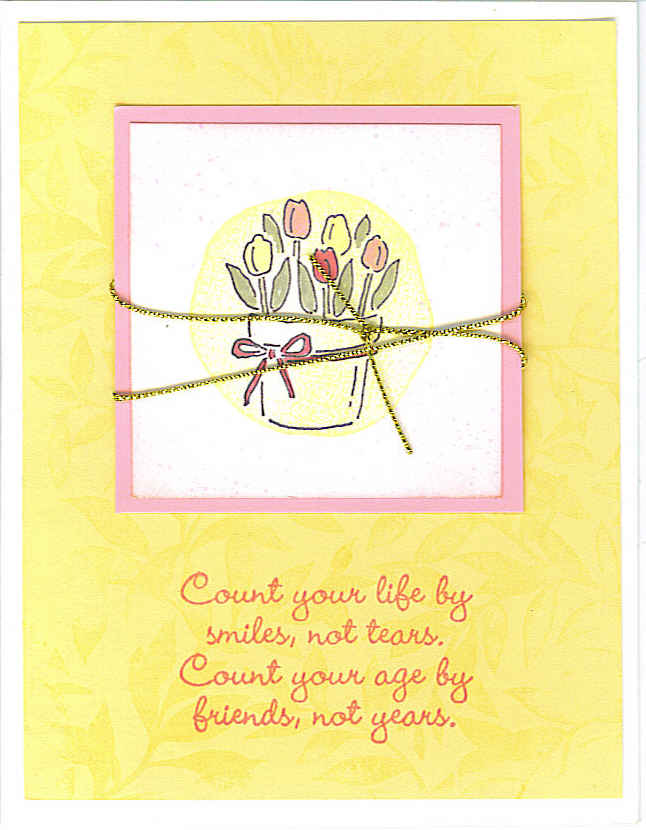
Have you taken time yet to think of some goals for next year?? The card to the left is actually the cover to the "Goals... 2007" list that I made up for myself and my Sunday School class of High School gals. Inside I printed a sheet for us to write out our goals in each of 10 areas.

Here are the catagories... just to get you thinking!

A Fruit of the Spirit to work on... A Chapter to Memorize... A Devotional Goal... A Skill to Learn... A Project to Finish... A Person to Pray for... A Missionary to Adopt... People to Write to Often... New Meals to Learn to Prepare... Good Books to Read...

I know there are many more things I could work on, but if I meet my goals in half of these, I'll be thrilled!!

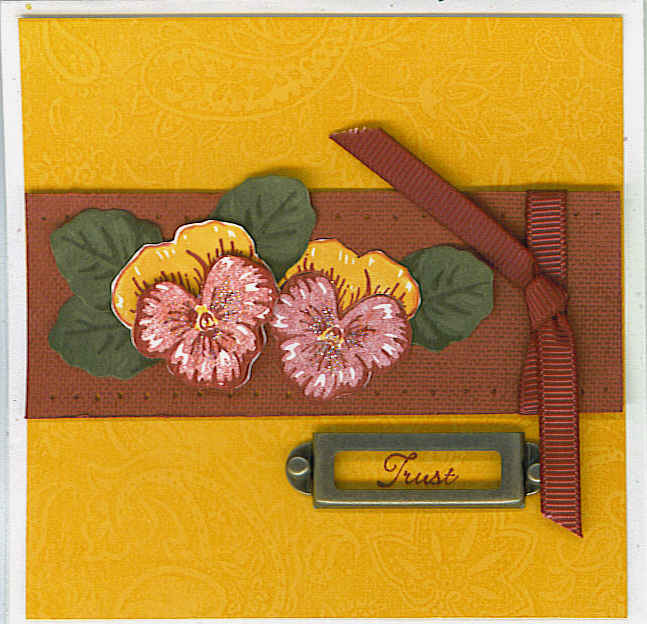
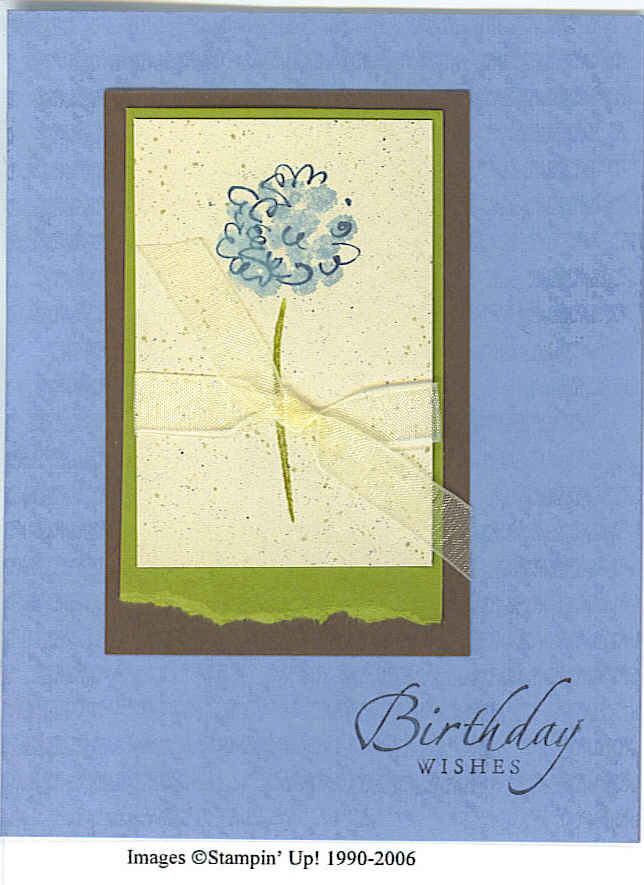
The stamp set I used is a new set called Polka Dots & Paisley that will be coming out in the Spring Mini Catalog. I wouldn't have picked it as being "my style", but Stampin' Up! sent it to all demonstrators as a Christmas present, so I thought I'd try it. I really, really liked it when I used softer colors!! Unfortunately, I'm still figuring out my new camera, so the pastels aren't as true as I'd like in the picture. Just imagine that the cardstock colors are Celery, Amethyst and Regal Rose. The flower is colored with Celery, Amethyst, Bashful Blue, Regal Rose & Apricot Appeal markers and it's tied up with a pink gingham ribbon. If you don't have any of SU's gingham ribbon, I would highly recommend it! It is so versatile and fun!!

I'll be gone from now through the day after Christmas, so I won't be posting. Thank you all for reading and have a wonderful Christmas!! :)

Thursday, December 21, 2006

Mom's Christmas Box


Wow! That was a process! I received some Christmas money that my husband wanted me to spend "on myself" - so, after much painful deliberation (Is anyone else horrible at making decisions? There were WAY too many choices!!) I decided to get a digital camera. It wasn't a very "fun" purchase for me. I really don't love digital cameras - but I wanted to be able to put 3-D images on my BLOG... so here you go!! :)

This is the card box that I made for my Mom for Christmas, using the Designer paper from the last mini catalog. I'm so pleased with it! I hope Mom likes it. Are you all ready for Christmas? We celebrated with our family on Tuesday night, so I feel like I can already breathe a sigh of relief. Tomorrow we leave for downstate where we'll have Christmas with both sets of parents & all the brothers and sisters.

Merry Christmas... if I don't see you before then!

Monday, December 18, 2006

Christmas Love Notes

I am so excited!!! :) School is done, the cantatas we've been practising for are done, most of my presents are done... if not wrapped... and I'm on VACATION!!!!!! Ahhhhhh. :) These little love notes use the Designer Paper from the winter mini catalog & the J from the retired JOY set. I made them in sets of three and added an RSVP pen lined with matching paper, tied them with a stitched cranberry ribbon (which I love!) and gave them to the teenage girls in my Sunday School class as a gift. They seemed to like them, and I'm sure they'll come in handy as thank you's after the holidays.

Are you all "caught up" for Christmas?? My house is upside down (I'm going to let FlyLady help me "crisis clean" today) and we're supposed to have our family Christmas tomorrow, so I think I'll sign off for now! :)

Thursday, December 14, 2006

Think Outside the Stamps


Hi everyone!

I just had to share the card I made tonight - even if it isn't stamped. The teacher that I work with said that she would like to have a "little dog". This was the closest thing I could find. :) The scottie dog is a Mary Engelbreit cross stitch from the Dollar Spot at Michaels. I backed it with fabric and attached it with brads so she can take it off and use it for a bookmark... and also because none of the tape I had would stick to the fabric! :)

I attached fabric to the cardstock using Steam-a-Seam. (It's like interfacing that's sticky on both sides). Then I tied it all up with a polka dot bow. It makes me smile! I have some more cards to do tonight - so maybe I'll post twice... if they turn out!

Wednesday, December 06, 2006

Simple Snowman


I have been so incredibly busy this week with traveling and school that I haven't had a minute to stamp! This is the card that I had my 5th graders do for "Mrs. Traxler Tuesday". We stamped 4 cards to use as thank you notes, and colored them in with watercolor pencils and blender pens. The kids thought it was fabulous. Even the one boy in my class loved it! :)

Only 7 more school days until break. Maybe I'll be able to find time to decorate my house for Christmas then!! Keep checking back. I'll try to put up a card every few days, even if I'm swamped!! :)

Oh - let me know if you're interested in receiving a Sell-A-Bration brochure. We'll be having a get-together in early to mid-January to play with the Sell-A-Bration sets... which I just LOVE!! :)

Bye!!

Thursday, November 30, 2006

Birthday Girl Tunnel Card


Well, I did it! I made a card without a torn edge!! :) LOL. This is the Technique Challenge for SplitCoast Stampers... It's called a tunnel card. The inside of the card pops out as it opens... hence the ribbon to keep it shut! :)

If you'd like to see the inside of the card click here. There's a great tutorial here as well!

It's my oldest daughter's 16th birthday today. This will be her birthday card. Hopefully, it will never be thrown away, since it took me 3 hours to make it!! :) (No, the card wasn't really that hard... I just couldn't think!)

Have a wonderful day!!

Tuesday, November 28, 2006

Fancy Flower


After making a number of cards for a friend tonight, I found this stamped background on an Artichoke card and attempted to finish it up. I'm not sure that I'm satisfied yet, but it will have to do for now! I used the flower from Watercolor Garden II, a greeting from last years Sell-A-Bration set, my trusty Linen stamp and the older Script background. The colors are Cranberry, Moss and Artichoke. I've just noticed that every card that I've made in the past month has had a torn edge. I might need to try some "clean lines" here soon! :)

Have a great day!

Monday, November 27, 2006

Something from the Archives


Did you have a good Thanksgiving? Ours was nice. Turkey and the fixings at home, then traveling to see family the next day. We got home late Sunday night and fell into the routine of school again this morning. Needless to say, I haven't done any stamping! :)
This card is from my archives. One I actually had to send to someone... but took a picture of first. The colors are Amethyst, Celery and Apricot, and it was one of my first attempts to sew on cardstock. It's such a cool look, but I hate getting out my machine!
For those of you who are my customers - just a reminder that the Holiday Mini Catalog is only good for a few more days. Be sure to let me know if you need anything!
Have a great day!

Thursday, November 23, 2006

Bear-y Thankful


Happy Thanksgiving!

Today's card got me up early. I had done a challenge on SCS yesterday using this layout, and my daughter had suggested that I do the same layout using this set. She was right!

The main center image is 2-3/4" x 1-1/2", the lighter blue rectangles are 2-3/4" x 1" and the NQ Navy Rectangles are 3-3/4" x 1". I used the faux suede technique for the bear. Before stamping, I ran the cardstock through my crimper a number of times - first one way, then turned sideways - until it was limp. Then I seperated the layers and stamped my bear on the suede-y surface. The cardstock is Bordering Blue and the Bear is stamped in NQ Navy. (I had trimmed the cardstock with my Creative Memories Antique scissors before I crimped it.) I embellished that with a little Linen Thread, and then mounted it on a piece of the In Color Buckaroo Blue. I used a sponge inked with brown to age it a little and set off the main image. It also seemed to help it blend a little better with the thread. The mountains are also stamped in NQ Navy on Buckaroo Blue. To get the mottled look I turned the stamp sideways after stamping my main image and "stamped off" across the cardstock. My NQ Navy rectangles are stamped in Paisley and Linen. I mounted all of my color blocks on black and attached it to my NQ Navy card. This is such a fun layout!! I loved working with it.

If you'd like to see my other card, click here.

I hope you have a great Thanksgiving!! :)

Tuesday, November 21, 2006

Silent Night

Tonight's card was for the SCS Color Challenge using Bashful Blue, Cranberry Crisp and Old Olive. I didn't have any Bashful Blue - so I used Bliss Blue instead. It was in my scrap drawer! :) My background layer is Paisley (of course! ) and my main image is from the retired set A Gift of Love. I used watercolor pencils & markers to color my image - added a few Dazzling Diamond stars to the sky and layered it on Cranberry & Olive, tearing the corner & added some blue brads to pull my Bliss Blue in again. The zigzag stitch is a Hero Arts stamp that I've had forever & keep forgetting to return to Debbie Olson.... (I promise I'll get it back to you, Debbie!!) and the card is topped off with a gold clip & some gold cord and cranberry ribbon.

I wouldn't have put these colors together without encouragement... although - come to think of it - these are the colors in the SU Holiday Designer paper... only available through the end of the month. Hmmm... I might have to place an order!!
I made a baby card tonight, too... but it seemed kind of plain to post. Maybe I'll do it later this week when I don't have any time to stamp.
Have a fabulous day!

Monday, November 20, 2006

Come to the Stable


Tonight's card uses a "faux wood" technique for the background. It is SO easy!!! :) Using my reinkers, I put 3 drops of Caramel, 1 drop of Cocoa and 1 drop of Chocolate Chip on the top of a plastic stamp storage box. I took an old $ store toothbrush and rubbed it in the reinkers and then started rubbing it across my page the way I wanted the "grain" of the wood to go. Dark spots are ok... they make it look more authentic. When I had my "wood" inked as I liked I used a ruler and drew lines for "boards" and squiggly lines and dots to look like jagged ends and nails.

For my main image I used an old SU set called Gift of Love inked with a Chocolate Chip marker and overlaid with Linen inked with caramel and sponged the edges with a brown sponge. I used Wire Works that I unearthed from the back of one of my drawers and the star brad is one that I picked up at JoAnns'. I couldn't decide if a saying would help or detract, so I just left it. I can always add one later!

Thanks for stopping by!

Saturday, November 18, 2006

Snowman Love


Today's post was my SCS challenge for yesterday. We were supposed to use stamps from different sets to create a humorous winter scene. I'm not sure that mine is very humorous... but it's sweet! :)
I started by inking the animals from Christmas Gift Tags with an Olive marker and stamping them on a corner of moss cardstock. Then I masked the animals and stamped the tree from an older demo-only set called Santa and Friends . My main image is the snowman stamp from the same set, colored with watercolor pencils and markers. I mounted this on bordering blue and then mounted it on torn, confetti-white cardstock that I had dry embossed with snowflakes.
I think when I get this posted I'm going to go back and add some Dazzling Diamond Snow, just for fun. There is very little embellishment. Just a brad from the Vintage Brad Collection. I tried using some silver cord... but it was just too much for my personality. :)
Now - if anyone actually reads this blog! - if you haven't already done so, you need to visit my downline's blog. Why am I saying this! Once you've seen hers, you'll never come back here!! Her work is absolutely incredible and professional. Besides which, it makes you want to buy everything in the catalog! :) LOL Tell her I sent you! She's been blogging for three months and has had 100,000 views. Can you imagine?? Here's the link...
Enjoy!! Maybe I'll have to have a drawing soon too... Just to see if anyone is out there! Have a good weekend! See you on Monday!

Thursday, November 16, 2006

Thyme Tree


Hi everyone! My card tonight started out as a Split Coast Stamper challenge... in copper. I embossed my Deer, mounted it... used copper cording, posted it at SCS... and then decided that I didn't really like it very much. So I changed it to a tree card. It doesn't even have any words on it! I guess that makes it "All-Occasion". :) I still couldn't get the ribbon color to behave on the scanner. It really isn't quite so dark in real life.
If you haven't ever checked out Split Coast Stampers, you really should. I put it off until this week, but finally decided to be sociable. And I kept hearing about these color challenges. You are given certain colors which you have to use to make a card. It is SO good for me. It gives me a "box" in which to be creative. I have a hard time with too many choices! LOL
I've got to finish cleaning my stamping room now. It's a disaster!!!!!! Plus, my husband said he was going to take me out tonight. Awwwwwwwwww ! :) See you tomorrow! Bye!

Wednesday, November 15, 2006

Color Challenge

I decided to do the color challenge from SplitCoast Stampers today... Bordering Blue, Celery & Eggplant. (Thank you, Angie, for helping me to figure out my scanner a little better! :)

So... this card uses the Polar Bear set, as well as the wish stamp from last year's hostess set, Small Script. I stamped the Polar Bear on Vanilla cardstock and watercolored a little Bordering Blue to help him stand out. The bears are sitting on a Bordering Blue snow pile... although here it looks more like they are floating on a iceberg in the middle of the ocean! :) The little snowflakes are cut out and mounted to the card with glue dots. The greeting is stamped with the VersaMark pad and embossed in White.

What a fun challenge. I need to figure out how to post this in the gallery! :)

Bye for today!

Tuesday, November 14, 2006

Night Before Christmas


Twas the Night Before Christmas... I told you this set would come out sooner or later! :) Isn't he just adorable?? I used 2 sets, plus a wheel and a background stamp on this one, and still used pieces from my scrap box, although I did pull a piece of Vanilla for my card itself. The ribbon is from Michaels and it blends a little better in person. In case you can't tell - the colors are Rose Red and Olive. The saying is stamped in Burgundy.
Here's my trick for the day for those of us that don't have the ticket punch. Pull out your 1/4" hole punch and use that to punch the corners for the brads. They may not be perfectly centered, but they'll be close! :) Ahh, necessity - the mother of invention! :)
Can anyone help me? Is there any kind of less expensive digital camera that would make these cards come out in the correct colors??? Uggh! Does anyone have any suggestions? I know that I'm scanner-stupid, so maybe that's my problem, but I'm so frustrated when pretty cards come out looking like I have NO sense of color coordination! I'd have to ask for the camera for Christmas, so it can't be exorbitant. I don't usually get expensive presents... but even if I could save up for it!!
Thanks for reading!

Monday, November 13, 2006

Happy Hot Cocoa!


OK, so I didn't quite make it to Christmas! :) At least I'm at the hot chocolate stage, especially since we had about 5 inches of snow the other day. Most of it is gone now. How sad! This cup and saying are from Winter Wilma, back in 1999. I think that qualifies as ancient in the stamping world! I found a perfect piece of vellum - precut and everything - and stamped it with the marshmallows, but when I put it on the Brocade background it got lost, so I layered a strip of Lavendar (also precut... Yippee for scrap pieces!) underneath. It's a fun card with soft winter-y colors.
Thanks for reading!

Saturday, November 11, 2006

Another Wagon Journey

Ok - every other blog I checked today had a Christmas card posted. Maybe my next set to use will have to be Joy, but I couldn't resist sharing this wagon of love before I move on to more season-appropriate cards. :) The colors are Marigold and Real Red, with the wagon stamped in Cocoa on Cocoa cardstock. It was a LOT of cutting and very putzy, but I got to use my Paisley stamp again, and I was pleased at how it turned out. It's so bright and cheery! :)

Off to travel for the weekend now - see you on Monday!

Thursday, November 09, 2006

Wagon Journey

Here's card #1!! :) I think this is the first SU set I ever ordered, and I haven't ever been able to let it go to a new home, but I haven't used it in a "coon's age" (whatever that's supposed to mean!) I stamped the Moss cardstock with the presents and then used Debbie Olson's trick of stamping over it with the linen stamp to "age it". The bear is watercolored on Naturals Ivory Cardstock, mounted on Chocolate Chip and tied with a piece of ribbon that was in my scrap box. The friend stamp is from last year's Sell-A-Bration set Noteworthy.

Yippee! I feel like I accomplished something! :) Hmmm... what's next???

Wednesday, November 08, 2006

Pumpkin Patch

Well, my hopes of placing an order anytime soon flew away in the form of a refrigerator repair estimated at $200+... So, I've given myself a two-part challenge. Over the next few weeks... or months, if it takes that long... I am challenging myself to make at least one card from every set that I own... including TAC sets & SU wheels. I have a little three drawer storage unit under my desk that holds different size scraps of cardstock and it's overflowing, so the second part of my challenge to myself is that I have to use as many scrap pieces as possible - so no cutting into new cardstock if I can help it. I'm so glad that I got those new background stamps before the refrig went out!! :) Yippee!!

So, how about you?? Do you have some older sets that you haven't used for awhile? Do you have lots of scraps?? Let's see what we can accomplish while stamping "under budget". :)

Today's card uses the poppin' pastels technique. I stamped the pumpkins in versamark ink and colored them with pastels. Three of the pumpkins are on the paper and three are colored and cut out. I didn't use dimensionals to mount them because they seemed to jump too far off the page. I used the Houndstooth BG stamp on the Caramel CS and the grateful stamp to soften the main image - along with a liberal dose of sponging in Rust and Chocolate inks. The brads are from the Vintage Brad collection, which I've really enjoyed.

Thanks for reading! Let's stamp!!

Tuesday, November 07, 2006

Comfort & Joy

I was all set to make a snowflake card tonight, so I stamped my Eggplant Paisley Background and took out my White cardstock... and realized that I lent my snowflake set to a friend! :) Oh well! I decided to play with a little snowman stamp from TAC instead. I colored the snowman with markers and mounted it on my background and then onto Mauve cardstock (Who knew I'd ever need that again!) After stamping my greeting, I really was happy with the card... but it looked a little plain. (Maybe I should've left it that way!) So... I tore a corner and added the snowflake and wrapped it with a little gold cord for good measure. The Rose Red around the outside is just the color I layed it on to scan it. When I scanned it on white the colors all changed. It really is adorable in real life! :)

Thanks for reading... At least I think someone's reading! I get a few comments here and there that make me believe I'm not just talking to myself! :)

Bye!

Monday, November 06, 2006

New Colors

I was asked to make a gift certificate for a party that I'm attending tonight - so I pulled out my new colors - marigold and cranberry crisp - and an old set - Pansy - to make a quick cover. This is a 4 1/4" x 4 1/4" card - I think that I'm stuck on square cards right now. I used my new Paisley BG stamp - which I'm going to LOVE - and my new Linen BG stamp - which I'm also going to LOVE and pulled out a piece of hardware that I picked up at JoAnn fabrics. The leaves are stamped on Artichoke cardstock. The Marigold looks a little green in my photo, but it isn't. It's warm and fallish. I knew I had to try this color combo when I saw Deb Olson's card here... http://debbiedesigns.typepad.com/muse_and_amuse/2006/09/a_bodacious_cel.html#comments

I printed the gift certificate on a piece of light yellow background paper and trimmed it to fit inside the card. I hope the winner will enjoy it!

Have a wonderful day!

Thursday, November 02, 2006

A New Old Set

I was so excited to get this set in the mail today. I have been "wishing for" the Wishing Well set for a few years now, but hadn't found one that I could afford. It's so my style. Tonight's card isn't fancy... but it did use up a few of the scraps in my scrap box! :) And the hardware always adds a little, too. I'm so unhappy with the colors as they show up online... but the idea is there. You'll just have to trust me that it's prettier in person!

So - pull out your scrap box, a ribbon or two, and your box of hardware and create something! You'll have such a sense of accomplishment - I promise!

Wednesday, November 01, 2006

At A Snail's Pace


OK, here's my little girl card for tonight! The snail is from a TAC set that I have, and the Greeting is from Friend to Friend. I love that handwriting!! :) Turquoise and Green Galore are such happy colors, don't you think? And I think the 3 x 3 card size is perfect. I think I'm going to add some glitter to the snail's shell just for fun. This is for a little girl in my 5th grade class. I hope she likes it!
Happy Stamping!

Tuesday, October 31, 2006

Tempting Trees


Oh, I wish you could see these cards in person! They really lose something online! I pulled out an Earth Tone Mat Stack that I picked up at JoAnn's awhile back and paired a few pieces up with Artichoke Ink and Naturals Ivory Cardstock, a couple of brads and a piece of ribbon. The "in person" card is so earthy and restful. Perfect for the man in your life, or even a card for the holidays. I sponged the Ivory cardstock with a little Artichoke and a little Olive to brighten it a little and added a few speckles with the speckle stamp. The card below has glitter on the trees (that doesn't show up in the scan... uggh!) - It's so pretty! It looks like a frosty morning. Two birthday cards done!! I have to do some girl cards tomorrow!!


Count Your Blessings


Good morning, friends!

I think I've decided that before I start many more birthday cards, I need to clean my stamp room. My whole house, perhaps!! It's a disaster in here! www.flylady.net , here I come, (again!). Seriously - if you need help with organization, that is the place to go!

Anyway - here is a softer colored birthday card, perfect for an older lady in your life. The colors are Barely Banana, Pretty in Pink and Rose Red. I stamped a circle shadow stamp in banana, then the flowerpot from Nice & Easy Notes. My greetings from Nice and Easy are mounted on the ends of the blocks, rather than with the picture itself, so it's easy to mix & match the words and greetings. I used my markers - Pink, Banana, Rose and Moss - to color the flowers and leaves, speckled with the speckle stamp and added just a bit of Rose sponging to the edge of the white cardstock. My background is stamped with the retired Leafy Glade background and the words are from Friend to Friend. It seemed to need a little glitz - so I added the gold cord as a finishing touch.

I can't wait to get a few of the sets from the new mini catalog that I saw yesterday! I'll be preordering here in a week or so, so I'll try to give you some sneak peaks! :) I really, really like some of them!

Have a good day!

Sunday, October 29, 2006

WildLife


I had so much fun yesterday in Green Bay!! :) I visited Hobby Lobby, JoAnn's, the teacher store, and hit the jackpot at Michaels!! :) They had wonderful little Mary Engelbreit things in their $1 spot - great for last minute gifts - and I was able to find a set of those very cute nesting boxes (Mary E, of course) for $2 on clearance. Plus I got some very cute stitched ribbon - and I got to get a hot donut from Krispie Kreme... Mmmmmmm....

Anyway! My card for today is made from an older set called Yukon. I used three colors for this card - Navy, Moss & Caramel, with a wide piece of navy organdy and a little gold cord to finish it off. Such a simple, reproducible guy card! I need to make oodles of birthday cards this week, so you'll probably be seeing a number of them!! :)

Have a blessed day!

Saturday, October 28, 2006

Changing Seasons

Have you ever had those weeks when you just couldn't seem to get anything done???? Arrgh! I was horrified to find that I hadn't posted since Wednesday, so I pulled out an "old favorite" to share with you this morning. Sometimes you need a card that is both elegant and simple. One way to give that impression is to choose one or two coordinating colors for your entire card. This sympathy card uses Lovely as a Tree in Brilliant Blue ink, stamped over three Mellow Moss background squares on Confetti Ivory cardstock. The Navy layer on the Moss card base tones down the Brilliant Blue of the trees and greeting.

Well, I'm off to Green Bay today... Hobby Lobby, JoAnn's, Michaels.... Aaaaaaahhhhhh!!!!! :)

Bye!

Wednesday, October 25, 2006

Thanksgiving Treats

Looking for a quick gift idea? How about this little project? It could hold tea bags, hot chocolate mix... even gift cards!! First, make an origami cup from an 8.5" x 8.5" piece of cardstock. Need help? Check out this site
www.netguides.org.uk/guides/origami/Cup.html. When your cup is complete, open it up and stamp the front and back flaps. (I used Lovely as a Tree and Rust ink.) Then put your cup back together, leaving the back flap up.
The image on the little tag used two stamps from Little Somethings. I stamped the acorn, masked it, and then stamped my leaf. I watercolored them using my markers and a watercolor brush, then mounted them on a little piece of Olive. The tag is Close to Cocoa cardstock punched with my Tag Punch. I used a square eyelet to finish it off, threaded it with Linen Thread and taped it to the inside of my little pouch. Voila! All done!
Thank you so much, those of you who have left comments! It's nice to know that someone is looking at the projects! :) Have a great day!

Monday, October 23, 2006

Pretty Pansies


Happy thoughts of spring! :) Tonight's card is a little fussier than I usually have time for, but I love the pansies... even if it is snowing outside! I took the time to stamp my pansies in "pieces". First I stamped them in Apricot edged with an Eggplant marker, and then stamped the detail in eggplant, as well. I stamped more pansies - this time the shadow was in Eggplant, stamped off once, and the detail in Eggplant - full strength. I then cut out the full pansies (Eggplant and Apricot) and layered the Eggplant pansy "faces" on them. The leaves were stamped in different strengths of Celery. The card uses the retired background stamp - Leafy Glade - , gold cord, gold embossing on the joy stamp , and brads from the Vintage Brad collection. A little more time consuming than some I would make... but, oh, so pretty!! :) A good card for someone who will really appreciate it... like maybe my Mom!

Sunday, October 22, 2006

A Blue Birthday

Since I spent the weekend at a quilt retreat, I'm going to post this Birthday card that we made at the show on Thursday. The colors were "fallish" to correspond with the chill in the air! :) First, we stamped our Brocade Blue cardstock with the Houndstooth stamp which we'd brayered lightly with Brocade ink. The flower from Heartfelt Thanks was stamped using the Bliss Blue, Old Olive and Not Quite Navy markers... spritzed with water after coloring on the stamp to soften the image a little. We speckled our Ivory Naturals cardstock with the speckle stamp and Mellow Moss Ink, layered it on a torn piece of Old Olive and bedecked it with a ribbon. Then we layered it all on a straight cut piece of Chocolate Chip cardstock, and finished up by stamping our greeting in Not Quite Navy. Simple, Quick & Easy... my three favorite words.

Have a good day!

Friday, October 20, 2006

Sparkling Snow


Today's "Blog Bling" is a snowy trading card done in different shades of blue. On my piece of glossy cardstock I stamped a number of snowflakes with versamark ink. Then I inked up my brayer (Brocade Blue, I think!) and brayered over the versamark snowflakes - a number of times, until I really noticed the white snowflakes "pop out". Wipe this layer off with a tissue or paper towel to shine up your snowflakes. I then stamped two more snowflakes in versamark and embossed them with Iridescent Ice embossing powder. As a final touch, I stamped tiny snowflakes in Ballet Blue ink. I layered my focal piece on Brocade Blue and Ballet Blue and added the little corner piece stamped with "joy". (I actually added the little corner piece to cover up some Ballet Blue snowflakes that turned green since I'd forgotten to clean my stamp first.... but we won't go there!) After tying a little silver cord all around, my little package was ready for presentation. :)

A couple of the gals at my show last night wondered if they could give me a challenge. They would give me a stamp that they just couldn't seem to figure out anything to do with, and tell me what paper colors they had. I would then make a card or two for inspiration. It sounds like fun! Want to join them? Email me and we'll work out the details. I may have to have you send me the actual stamp, or set, if I don't own it already. Then I'll send back both the set and the cards I make. I'll probably post them first, though!

Thanks for reading! Have a wonderful day!

Wednesday, October 18, 2006

Heartfelt Joy

Remember my color group challenge to myself from the other day? This is my Bold Brights card... Turquoise, Apricot, Celery and Regal Rose. We all have favorite color groupings and this one is definitely out of my comfort zone! I used the Heartfelt Thanks set again, stamping the outline of the flower as a background on my turquoise base and then using my markers to color the bolder flower to stamp on the white cardstock. After I colored each flower with markers, I spritzed the stamp with a little water to soften the look when I stamped it. It's hard to see in the picture, but "up close" the flowers almost look watercolored. I layered the main image on Rose and Celery, stamped the Apricot piece with "heartfelt" and tried to figure out what I was missing. I settled on trimming the corners of my white cardstock, accenting the colored cardstock with gold brads, and then stamping "joy" very, very lightly in Regal Rose. I tried adding ribbon, but it seemed to detract from the simple lines, so I stopped. :) Don't be afraid to enjoy simplicity - in life as well as stamping!!


I'm off to school now, then to prepare for my show this evening. :) Hope your day is one of heartfelt joy!

Tuesday, October 17, 2006


Have you ever wondered what to do with those "little" images? Try framing them!! Use your square punch - any size will do - and make a frame for that tiny piece of artwork.
This card is a simple color block card with eyelets & a few small pieces of ribbon to dress it up. I used the heart flag from Little Somethings both to provide background on the Burgundy cardstock and as my main image, which I watercolored using my markers & a watercolor brush. How do you watercolor with markers? Simple! Using one of your storage boxes as a palette, scribble the marker on the box and pick up the color with a wet watercolor brush. Works like a charm!
I'm working on putting together my show for Thursday night. I'm pleased with the projects, but I'm not going to post them here until after the workshop. I'd hate to give anything away! If any of you are in the Pembine, Wisconsin area, you are more than welcome to come!! I especially like the Thanksgiving pouch. Fun, fun, fun!! :)
Happy Stamping!

Monday, October 16, 2006

Hedgie Love Notes


Have you seen the new Love Notes & Envelopes from Stampin' Up!? They are adorable! 3" x 3" when folded. Of course, you can't mail them, but think of the possibilities for gift cards, valentines, and "just because"! :)

For my "love note" I simply cut a 3" x 6" piece of Vanilla Naturals and folded it in half. I love that I can buy the Envelopes seperately!! :) I stamped my Hedgie (from a retired set, Halloween Hedgehogs) and colored it using watercolor crayons and pencils, then centered it in my tag punch. It's matted on moss & cocoa cardstock and accented with a spiral clip, more gingham ribbon & a little linen thread. My Little Hellos set worked again for the "friends". Next to the Ruby Red strip I did a little paper piercing to balance out my accessories.

Have to run now! Have a wonderful day!! :)

Friday, October 13, 2006

Peaceful Elegance


I am not necessarily an "Amethyst" person, but I had a piece of Amethyst cardstock laying in my scrap pile, so I decided to see what I could come up with. I chose the set Heartfelt Thanks, my favorite from last year's catalog, and picked out some markers to color my stamp. Using Amethyst, Regal Rose, Celery, with little Apricot watercolored in, I was able to get the restful, serene look I was after. The flower is stamped on Vanilla cardstock, sponged & speckled with Regal Rose, which is torn to match the Celery that it is layered on. I stamped half of the Amethyst cardstock with the single flower from Heartfelt Thanks, stamped and cut out the Thanks stamp, and mounted them all on a folded piece of Ivory Naturals cardstock. The two Amethyst brads that I found in my stash seem to pull it all together. Another quick & easy template to follow!
Is it time to pull out that 2-step stamping set??? :)

Regal Thanks

Greetings everyone!

How did you do with the challenge from yesterday?? I can't wait to hear from you!

I decided to share my regals card next, because it was my girls' favorite. I stamped a folded piece of Burgundy cardstock with the Houndstooth Background stamp. (I would really like to get the Canvas and Linen Backgrounds, as well. They seem to add texture without being overbearing.) I cut and distressed a piece of Artichoke cardstock for my center strip & used a little more of my Moss gingham grosgrain to tie it off. My image - the wheelbarrow from Love Ya Bunches - was stamped with black ink on a piece of Ivory Naturals cardstock. After using my inkpads and a paintbrush to watercolor, I used a little yellow pastel to highlight the edges, mounted this on the new Elegant Eggplant, added a couple of eyelets, and Viola! my card was finished! :) My favorite eyelet tip - punch the holes for double eyelets with the double hole punch. They are always evenly spaced that way!

Thanks for reading. See you tomorrow!

Farewell Fall


I had so much fun creating last night! I sat down with different Stampin Up! publications and picked out some cards that I could use for templates. I seldom used the same colors, but the ideas were fuel for thought. I decided that I would make at least one card from each color group, earth, regals, subtles and brights. Here is my earth tone card for the evening.
I started by stamping the leaves from Lovely As a Tree in Rust ink on Rust cardstock. I then stamped the same image in Black ink on a piece of Vanilla cardstock and colored it in with my watercolor crayons and a paintbrush. I added a few Moss speckles & sponged the edges with rust for color. I layered this focal piece on rust, and then again on Mustard, cut a little larger and torn on one side. I used Moss gingham grosgrain ribbon, a moss button and a little piece of linen thread as my embellishments, holding them in place with SU!'s Mini Glue Dots - one of my favorite ways to hold embellishments in place. They are small and super strong, so they are great for holding buttons in place, or cardstock with brads in it. I stamped my Sincere Salutations greeting in Moss ink on Moss cardstock, tore the edges and crumpled it a bit to look more "fall-ish". How fun!
Now a challenge! Using this card as a template, look through your (mostly unused) stamps and find one that you could use as a focal point. Pick out a few pieces of coordinating cardstock and jump in and try it! It doesn't have to look like mine. Mine doesn't look like the one in the book! Just enjoy the process. And - if you can bear to part with it when you're done LOL - bless someone's day with it when you're finished. Oh, and be sure to leave me a note when you're through! :)
PS If you like the look of this stamp, or these colors, be sure to check out the Stampin' Up! website for the current Stampin' Up!/Country Living promotional kit. It comes with precut stamps, cardstock, inks & lots of embellishments, as well as instructions for a number of different projects. It would make a great Christmas gift for you or someone you love!

Thursday, October 12, 2006

Baby Dear


ATC's, 2 1/2" x 3 1/2" mini cards, are a wonderful way to use smaller images. Today's card would work well as a gift enclosure for the new mother in your midst.
I started by stamping the Giraffe from Little Hellos on a small piece of white naturals cardstock, and coloring it with my Stampin'Write markers. I sponged the edges and layered it on Pretty in Pink cardstock, after adding a silver brad and some dry embossing for depth. The Bliss Blue cs (I still have some left, so I haven't bought the new Bashful Blue yet!) is stamped with the Houndstooth BG stamp. I tore the edge, layered it on my base color - Celery - and wrapped it all up with gingham grosgrain - one of my favorite accessories.
ATC's are great mini canvases to try out different techniques. Maybe tomorrow I'll post the mini snowshower ATC that I finished last night... since I heard it's supposed to snow today!! Brrrrrr! Off to make myself some hot chocolate. Bye!

Wednesday, October 11, 2006

"Stamped Stamps"


It's fall! Don't you just love the fall colors?? I pulled out my SU Watercolor Minis set and my retired Leafy Glade background stamp to put together this quick card using Ruby Red, Old Olive & Very Vanilla cardstock. The trick for the stamped stamps? I punched a square slightly smaller than my Mustard background stamp in a piece of regular copy paper & stamped the tulips through the square. (The tulips are stamped in Coral, Ruby Red and Old Olive) I trimmed the edges with my handy-dandy Fiskars mini zigzag scissors and sponged them lightly with ruby red to add some texture. The picture doesn't show it, but I added a little glitter, too. Glitter is kind of like flour on the nose when baking. It lets people know you've been working hard because invariably more ends up on you than on your card!!


The word window punch works great for the tab on the side, but, unfortunately, I don't have it yet. A tight budget, I'm told, fosters creativity. Let's just say that I'm very creative! LOL


Thanks for stopping by! I hope you'll visit often!!